Quick Overview of This Article
One of the most profound statements that Abraham Lincoln said is, “Give me six hours to chop down a tree and I will spend the first four sharpening the axe.”
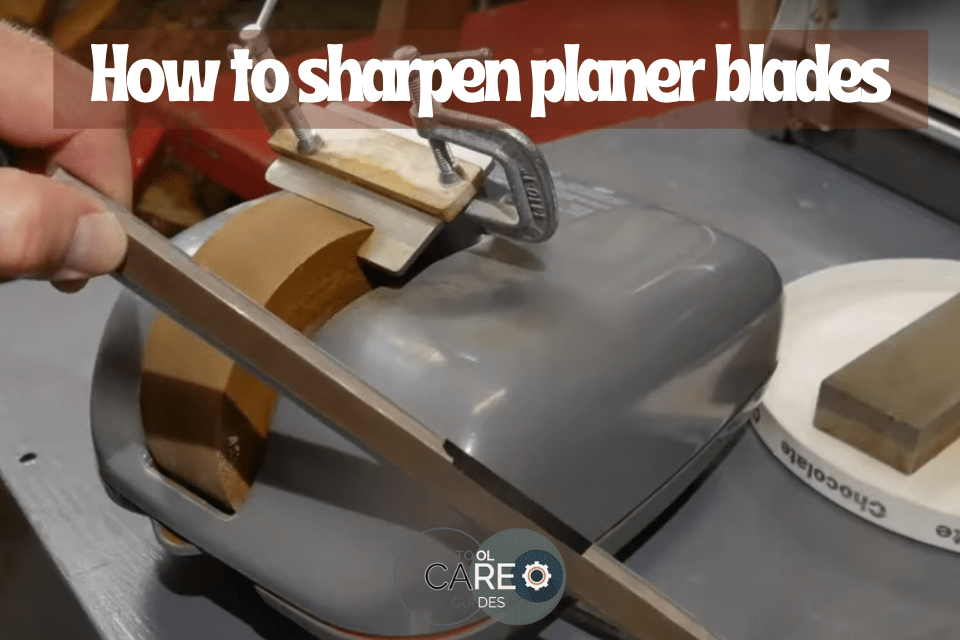
Just like the axe, your planer blades need to be sharp for maximum results. But, how do you sharpen these planer blades like a pro? This article will get you the answer to this question.
So, read on!
You can use your planer for months or even years, but sure enough, you will need to sharpen, polish, and fine-tune the blades if you need it to continue being efficient. You will therefore need a guide on the methods of sharpening planer blades.
While you can use the planer for many tasks, you will require to hone your blade more often for the best possible woodworking results.
Shaving wood with a blunt plane blade makes your work twice as hard, and the results are poor when you complete your woodworking project.
There are numerous methods you can use to sharpen the hand planner edges. However, this article will be focusing on the two main ways that are easy to use. We will also focus on some of the equipment that you will need.
Regarding how many times the blades should be sharpened, in most cases, it depends on the amount of material you will remove when sharpening the blades. If the blade is good and you are restoring the sharpness, you will only need to remove about 0.015,” and if you need to grind out the nicks, then more material will have to be removed.
Do you intend to have a quality woodworking project at the correct standards? If your answer is yes, you need to note some helpful tips and tactics.
But Before You Begin, ensure you follow these basic steps.
- Unplug that tool.
- Blades, whether old or new, can still be sharp. To avoid cuts or injuries, avoid brushing them against any part of your body.
- The more you remove any materials from the knives’ back, the narrower the blades become. To avoid this, just clear enough materials such that the blade does not bolt or strike the wood.
- Ensure that you secure the blades and have carefully gone through the provided instructions. These instructions will help you carry out all the processes like blade clamping correctly.
Top 5 Tips on Sharpening Planer Blades
- Keep Up Waterstones Maintenance
When it comes to cutting faster cutting, water stone is known for that. However, it requires regular maintenance for it to stay with a flat surface. This is because it is essential for straight edge production and wire edge removal.
- Hone scrapers with Diamonds
Most people like using diamond sharpening stones to put the final edge on a scraper before turning the hook. However, the diamond paddle works Better. It cuts much faster than the diamond stones, and definitely, it will not develop a rut which can be a danger when you continuously run the edge of that scalper with a stone.
- Accurate Paring Requires a Flat Back
Ensure the back of your chisel has a flat surface. For at least 2″ to about 3″. Despite the chisel looking okay, it can probably require to be lapped to have that flat surface ultimately.
- Remember this degree angle.
To ensure you keep things as simple as possible, keep these angles in your memory, 25, 30, and 35. They are the most consistent angle used for honing chisels, grinding, and plane blade
- Ensure you a honing jig, then improve on it
You can go to the shop or order online by creating your own free amazon business account and ordering one. You can also get it on special offers and have it sent to you to the shipping address of your choice. Further, in your order, you will get a well-illustrated guide on how you can achieve the desired perfect edge for your knife.
The good thing with Amazon is an affiliate advertising program where you can get a commission from sales referred through your link through product recommendations and product promotions to your website traffic. This program enables the owners of websites to earn their advertising fees by advertising through linking to amazon.
Also, if the item model you requested does not match the product description you gave, there is a return policy hence making your money safe at all times. For as long as the item is still new and unused, you can return it at no shipping charges from you.
A jig made of aluminum is very easy to adjust using a disc sander and a file. This jig comes in two positions for the clamping tools. There is an upper ledge for the plane irons and a lower pair, a V-shaped grove for chisels. When setting the honing angle, measure the distance from the blade tip to the jig’s body.
Methods Used in Sharpening a Plane Blade
The two most commonly used methods in sharpening plane blades are:
#Method 1: Sharpening a plane blade with Sand Paper
The use of sandpaper involves removing the metal from the blades. Despite sandpaper being an excellent way of extracting metals from the blades, it can leave some marks or spots on the bevel edges and the blades.
For you to sharpen the wood plane blades, the following materials are needed:
- Razor knife
- Leather strip
- Red polishing/buffing compound
- A screwdriver
- A 220, 320, 400, and 600 wet or dry sandpaper
Step instructions to be followed are
- To start with, disassemble the hand planes by ensuring the screws are loose. Also, ensure that you have cleaned the blade. Be careful with the cutting edges, and in case of paper shims, be sure to remove them. These shims are for closing the gap found between the plane body and the blade.
- Most sandpaper sheets measure 9” by 11”. To make more petite strips, use 220 dry paper, then put one of the strips on a level tabletop.
- Hold the plane’s bevel side, then place it over the sandpaper. Consequently, use adequate pressure to pull the plane (4-5 times) along the whole strip.
- Next, flip the blade such that the side of the slope looks upwards. One of the tips should be a bit elevated while the other sits on the sandpaper. To make a curve or slope on the blade, repeat the pulling process outlined in step three.
- Repeat the whole process using a 320-course grit, 400 medium grit, and 600 fine grit paper. After changing the paper, make sure that every grit that appears on that blade gets removed.
- Rub a red polishing compound on the leather strip. Next, let the bevel side sit on the polished leather strip and pull it backward (four to five times). Do the same for the blade’s back using the same procedure. By the time you finish the whole process, the plane blade will have a sharp edge.
- Lastly, you need to test if the cutting edges are sharp or not. To do the test, you will need to place the blade on a newspaper’s piece and try to cut it. When the paper comes out rugged, it is an indication that the blade is still not smooth or clean, and further sharpening is needed, starting again from 220 grit newspaper. On the other side, if the cut comes out clean, all the steps are followed.
After all, is done, fit together with your hand plane. To do this, put your blade where it should, then tighten the screw. Finally, test the plane blade on a scrap rim object. If the shaving comes out thin and neat, it indicates that you tightened the screw correctly. If not, you should tighten or loosen it. Tightening the screw makes a deeper cut while the latter produces a thin shaving.
#Method 2: Sharpening a plane blade with Honing Guide
Most people prefer using their hands to sharpen their blades instead of going for professional sharpening. However, your work becomes much more manageable if you are familiar with using the honing process method, also called a chisel jig.
This method requires less expertise and practice, making it the most straightforward alternative for anyone who is not a professional sharpener. Whether you choose to sharpen your planner blades or chisel sharpening, here are safe and easy ways of doing so:
But before that, you will require to have the following materials.
- Scrap wood pieces
- Honing guide
- Sharpening stones are the sharpening media, e.g., three types should be fine grit, medium, and coarse. In this case, 1000, 5000, and 8000 grits are recommended.
- Media choice: This can either be sandpaper, oil stones, diamond plates, or water stones.
The following is the sharpening process for this method
- Back
Start by positioning the blade’s back on top of the sharpening material. Next, pull it on 1000, 5000, and 8000 sharpening media. Try working on the first one inch that adjoins to the plane’s edge. While sharpening, the blade’s backside should be polished and flattened. To ensure the blade is flat, exert adequate pressure on it while sharpening.
You will realize that sharpening on the fine and medium grit sharpening media will take less time than coarse grit. Anyway, how do you know that you’ve sharpened the blade properly? When you see your face on the shiny surface of the blade (the one that resembles a mirror), then you can be sure that your blade is super polished and very sharp.
- Bevel
It is always challenging to ensure that the small area around the bevel angle edge is balanced on top of the sharpening medium. However, the honing guide sorts you out.
- Honing Guide
The honing guide’s primary goal is to offer the angle that is commonly needed to make the beveled edge sharp. If you hold the edge firmly, it becomes very easy for you to sharpen. When the angle is slight, it provides less durability, and hence 300 is taken as the best angle for good results.
While using the 300- angle, it is vital to make sure that you leave around 38mm of the edge out of the surface of your honing guide. Next, come up with a honing guide jig using two wood pieces (one of the pieces should have a square edge). Position the woods so that they are 38mm apart and make their position solid and firm using glue.
Pro Tip: Never forget that the jig should be holding the blade edge tightly. You can use a screwdriver to tighten it further.
Lastly, run the bevel edge against the three-sharpening media/ grits just like you did with the back. To be precise, check it with a magnifying lens. Consequently, you need to test your blades. You can use the previously discussed methods; the newspaper and rim material method. If the results are not satisfactory, repeat the entire process until the edge is sharp and polished.
Final Verdict
Knowing how to sharpen the wood planer blades helps you save money that you would have spent replacing the knives due to regular disposing of blades. Additionally, you cannot believe the time you save by always using sharp blades.
Even though the manufacturing idea of the design was to dispose of and replace the planer blades every time they get blunt, you can always opt to sharpen them. By sharpening them, you increase their running time by a few weeks or months.
However, sharpening can be tedious and time-consuming, especially if you have decided to make a jig on your own. Fortunately, some manufacturers and dealers do build jigs hence making it easy for you to buy.
Furthermore, instead of removing the knife so that you can be sharpening them, you can permanently attach a gritstone to your homemade jig, slide it across the edges of your blade to sharpen it. Super easy, right?
Alternatively, you can remove the knife, attach it to your jig then sharpen it on the gritstone.
If you intend to work on your sharpening skills, you can check some of the top-rated woodworking books here.