Quick Overview of This Article
Do you want your lawnmower to last longer and always work at optimum levels? If yes, you need to maintain it properly. One of the main ways to care for your lawnmower is by cleaning the lawn mower grass bag.
But how do you clean the lawn mower grass bag? Where do you start? You should begin by removing the dust or dry matter clogged in. Next, clean it using water and finally deep clean it to get rid of toxins, mold, and stains.
However, this is easier said than done. To truly understand how to clean your lawn mower grass bag, scroll down to the rest of the article. This post will show you what to do before cleaning the grass bag and the steps to clean it. More so, you will learn various pro tips to take care of your lawnmower.
Scroll down to learn how to make your lawn mower durable by cleaning and maintaining it.
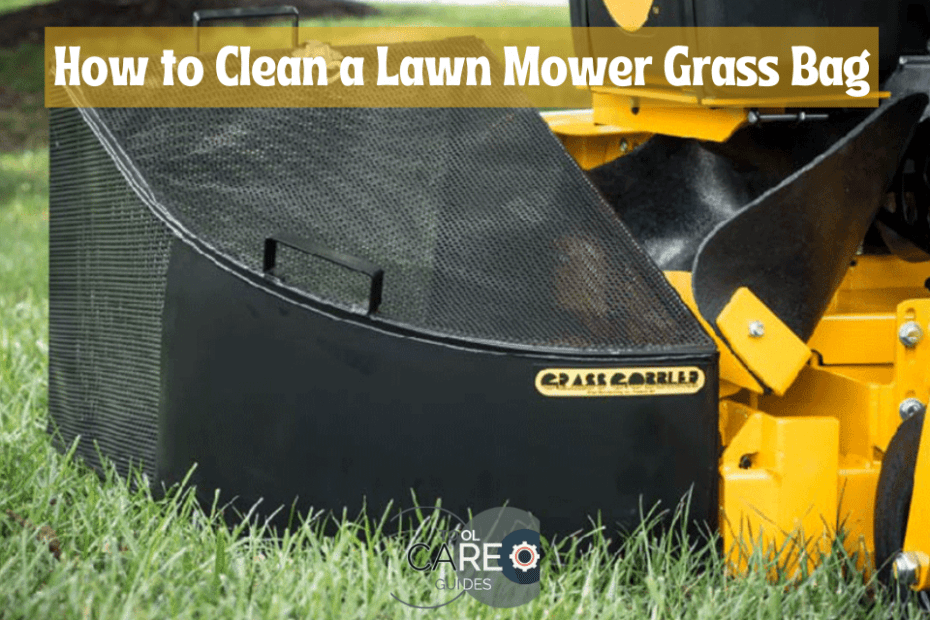
How To Guide on Cleaning Your Grass Bag
Just like other tools and equipment, the grass bag attached to your lawnmower needs to be kept clean at all times. Cleaning it regularly prevents the grass from molding and causing a foul smell. More so, it increases the lifespan of the bag.
In a nutshell, cleaning the grass bag involves the following steps:
- Preparing the bag before cleaning
- Unplugging the fabric pores
- Cleaning using hose pipe water
- Brushing the bag’s fabric
- Deep cleaning
We shall discuss each of these processes in a detailed way in the sections below.
- Preparing the Lawn Mower Grass Bag
Before you start cleaning your lawn mower bag, you need to take precautions to ensure your safety and that of your lawn mower. First, you should start by switching off the mower engine to prevent any accidents. Also, you should always ensure the safety is turned on while cleaning or performing maintenance practices on the mower.
Secondly, you should remove the grass bag carefully. Before disconnecting, go through the user manual of your mower to understand how to do it correctly. Thirdly, empty all the refuse (grass, leaves, etc.) into the lawnmower refuse bag.
Removing the leaves and grass is essential since they decompose when left in the nylon bag. After decomposing, they may lead to mold and fungus, making the bag produce a foul smell. The mold and fungus will make the bag material wear out thus not lasting for long.
Finally, shake the lawn bag thoroughly to remove tiny remains of lawn waste, thus making the cleaning process easier and faster.
- Unplugging the Pores of the Grass Bag Fabric
The pores in the grass bag can clog with dust or tiny lawn materials when mowing. During summer, when the grass is dry, and the yard has a lot of dirt, a lot of the dust or small leaves get stuck in the pores of the grass bag. This clogging makes the functionality of the mower deteriorate.
To solve this issue, do the following:
- Take your grass bag to a flat surface and put it in an upside-down position.
- Blow air in the outer region of the grass bag using an air compressor fitted with a nozzle or with a leaf blower. The air compressor should have low PSI (Pound-force per square inch) to prevent the bag from tearing. By blowing the bag, you will make the stuck lawn waste particle lose and thus unclog the bag.
- Once you blow the grass bag’s outer region, turn the bag inside out. Blow the inside part thoroughly, ensuring that you unclog most blocked pores. Before you finish, ensure you’ve removed as much lawn waste as possible to avoid the bag becoming muddy when using water to clean it.
3. Hosing the Lawn Mower Grass Bag
Once you’ve blown the grass bag thoroughly, it’s time to clean it using water. You can use a garden hose pipe to clean it.
Pro Tip: Consider using a pressure washer for quicker and better results. However, ensure it has a low PSI to avoid damaging the fabric since most lawnmower bags are made from nylon thus cannot withstand high pressures. However, if your bag is made from canvas or other rigid materials, you can use a pressure washer with high pressure.
Start by hosing the outer region of the bag, then proceed to the inside part. Hose both sides thoroughly before moving to the next step.
- Brushing the Bag
After blowing and hosing the grass bag, you need to brush it to remove other debris in the bag. To prevent the bag’s fabric from tearing, you should use a soft brush. The most recommended brush for this purpose is the utility scrub brush commonly used to scrub kitchen tiles or dishes.
If you currently don’t own a soft brush, you can use the one you use in the kitchen or purchase one online. Alternatively, you can use a toothbrush, but it is time-consuming and tiresome due to its small size.
You should not use hard-bristled brushes or steel bristles since the lawn bag material is made from nylon that can tear easily. After thoroughly scrubbing the bag, hose it on both sides. Turn the bag inside out and leave it under the sun to dry. Letting it completely dry will prevent mold or mildew formation on the inner part of the bag. Once it is entirely dry, you can reattach it.
- Deep Cleaning the Bag
The four steps we’ve discussed above are the basic steps of cleaning a lawnmower bag. You can take a further step by deep cleansing the bag to get rid of:
- Mold and mildew
- Foul smell
- Stains
You should deep clean the bag after you’ve hosed it down. Though there are stain removers available for purchase, you can make a stain remover yourself at home. To make a stain remover at home, you need the following:
- Hydrogen Peroxide
- Plastic storage can
- Measuring spoon
- Baking soda
- Blue dawn dish detergent
Once you have the materials ready, follow these steps to deep clean your lawnmower:
- Put the dish detergent and hydrogen peroxide in a container and mix them
- Add baking soda until its thick enough
- Pour the mixture on the parts with stains and brush softly
- Repeat the process until all the colors are no longer visible.
- Place the bag under the sun and let it dry.
If you lack the materials mentioned above, you can make a paste using vinegar and baking soda. The paste also helps eliminate stains.
For this alternative method, follow these steps:
- Put some baking soda in a bowl
- Add vinegar using a measuring spoon and stir it until it becomes a thick paste.
- Put some vinegar on the stain, then scoop a little paste using clean clothing and apply it on the part.
- Scrub the stained part until the stains come out.
- Sundry the bag once you eliminate the stains.
To prevent the lawnmower from staining the clean grass bag, you should consider cleaning the part where the bag attaches to the mower. Use a steel brush to remove any grime or dirt on that part of the mower, then reattach the bag once it is dried.
How to Remove Mildew and Mold from the Lawn Mower Grass Bag
Besides removing stains, you can use the two DIY hacks (stain remover and paste) we have discussed in the above section to eliminate mildew and mold. These chemicals (hydrogen peroxide, baking soda, and vinegar) prevent the forming of mildew and mold.
If you don’t like the idea of using the DIY methods, you can purchase the Star Brite Ultimate Mold and Mildew Stain Remover, which is very effective in eliminating mold and mildew. Once you have gotten rid of mold and mildew, you need to store the grass bar in a cool and dry place.
Pro Tip: If there is a likelihood that the bag will be exposed to moisture in the store, put silica gel which absorbs moisture leaving the bag dry and safe. Don’t forget to remove the silica gel during spring when you embark on using your mower.
Additionally, you can place 1-2 tablespoons of baking soda inside the mower grass bag then leave it for 12-24 hours. The baking soda will improve the smell of the bag. Before attaching it to the mower, make sure you remove the baking soda.
Pro Tips to Help You Maintain Your Lawn Mower
With proper care and maintenance, lawnmowers can run for many years. To ensure that your lawnmower is durable and keeps performing at optimum levels, practice the following eight tips:
- Proper Storage
To preserve your lawn mower, store it in a place that protects it from harsh weather conditions like rain or hot sunlight. Ensure that the mower is covered from dampness, cold winters, and rain by placing it in a closed garage or insulated shed.
Alternatively, you can park it on concrete but cover it all over using a tarp. However, the best option is to protect the mower with protective covers, which you can buy from hardware stores near you.
- Keeping the Mower Clean
Before storing your lawn mower, ensure that you first clean it after you’ve done using it. You should follow regular cleaning techniques to ensure the efficiency and durability of the mower. You should mainly focus on:
- Getting rid of lawn waste or leftover grass after mowing to prevent rusting
- Cleaning the blades and the area around them
- Unclogging or removing any debris that can clog the mower
Pro Tip: Most mowers are fitted with a hose connection that makes it possible to clean the mower’s deck while the blades are running. This design ensures that most grass gets off the mower, thus preserving the deck and preventing the mower from making the storage area dirty.
- Always Empty the Lawn Mower Bag After Use
Immediately after you have finished mowing, empty the clipping bag. If you leave the bag with leftover grass, it may become overfilled and cause damages to your mower. More so, the grass produces a foul odor if it decomposes and may cause the bag’s fabric to lose quality and break easily.
- Regular Engine Checkup
Before you start mowing, check the oil levels of the lawn mower and fill it if it is low. If the oil levels are low, the mower can develop engine malfunctions, damage the engine, or perform poorly.
Besides the regular checkup, you may check (replace if necessary) the following items annually:
- Spark plug
- Battery
- Air filter
- Oil filter
- Tightening Loose Nuts and Bolts
Always make sure that all bolts and nuts are tightened before and after using the lawn mower. While the blades are spinning, they vibrate and cause the bolts to loosen.
These loose nuts and bolts can cause the lawn mower parts to fall, which can cause damage or injury to the user.
Additionally, always ensure that you tighten the wheels’ nuts and bolts, thus making the lawn mower move efficiently.
- Sharpening the Blades
To ensure that the lawn mower blades are always cutting properly, sharpen them regularly. Though you don’t have to sharpen them after every use, you should always sharpen them when you observe the mower is cutting the grass poorly.
While sharpening, take precautions since the blades can injure you while sharpening them. More so, ensure you have removed the spark plug before sharpening the blade.
- Purchase OEM Parts
Whenever you need spare parts for your lawn mower, ensure you purchase Original Equipment Manufacturer (OEM) parts. OEM parts are always long-lasting and better than other parts bought from dealers.
More so, always take the mower to professionals whenever you need repair services.
- Go through the User Manual
It is always advisable to read the user manual after you have purchased a new lawn mower. Since different mowers have different specifications, it is crucial to understand how to operate your specific mower.
Additionally, whenever you need to replace or repair it, the manual will serve as your guide and prevent you from causing more damage. The manual will also contain the make and model of your mower and customer service contacts.
Final Thoughts
Maintaining a clean lawn mower bag will save you from unnecessary repairs and costs for buying new grass bags. More so, you should always use the tips discussed in this article to keep your lawnmower functioning well and to last long.
Always use the guide in this post while cleaning your lawn mower grass bag. Share this post with your loved ones since sharing is caring.